

Can You Use Racks in Soft Coolers?
Table of Contents
- Can You Use Racks in Soft Coolers? The Short Answer
- Why Soft Coolers Present a Different Challenge
- Cooler Rack for Soft Cooler: Compatibility and Alternatives
- How to Keep Food Dry in a Cooler Without a Rack
- Soft Cooler Packing Tips for Maximum Dryness
- Ice Packs for Soft Coolers: Best Practices
- The Hard-Sided Cooler Solution: Why Racks Work Best There
- Conclusion
- Frequently Asked Questions
Last Updated: October 14, 2026
Can You Use Racks in Soft Coolers? The Short Answer
No, traditional racks in soft coolers aren't recommended.
You can't use standard cooler racks in soft coolers, but alternatives exist. Understanding why racks fail helps you choose the right one.
At Cooler Racks™, our stainless steel racks are engineered for hard-sided coolers. If you're working with a soft cooler, this guide covers what actually works.
Why Soft Coolers Present a Different Challenge
Soft coolers are lightweight and portable, but their design creates problems hard-sided coolers don't have.
Weight distribution matters too. A hard-sided cooler spreads load across its rigid structure; a soft cooler concentrates weight in the bottom, where the fabric is thinnest.
Temperature transfer is another issue. In hard-sided coolers cold air circulates freely around the metal frame; in soft coolers, flexible walls trap air, so cold doesn't reach food as efficiently.
Cooler Rack for Soft Cooler: Compatibility and Alternatives
If you're set on a cooler rack for soft cooler setup, understand that "rack" means several different products, and only some survive inside a flexible cooler.
Why standard cooler racks fail in soft coolers:
- Legs sink into the soft base because there is no rigid floor to bear the load
- Flexible walls bow inward and press against the rack frame
- There are no anchor points, so the rack slides as the cooler is carried
Rack types and what each one does inside a soft cooler
| Rack type | Typical construction | Works in a soft cooler? | Why |
|---|---|---|---|
| Full-size stainless cooler rack | Welded or folding stainless frame, roughly 7 in tall | No | Needs a rigid base and rigid walls to stay level |
| Folding wire basket | Light-gauge wire, collapses flat | Sometimes | Sits loosely and carries only light items; no elevation above meltwater |
| Rigid plastic insert or tray | Molded HDPE or polypropylene | Yes, if sized to the interior | Spreads load across the base and creates a false floor |
| Silicone or flexible divider | Soft silicone or coated nylon | Yes | Adds compartments without adding structural load |
| Mesh organizer pouch | Nylon mesh with a zipper | Yes | Keeps small items grouped; adds almost no weight |
The pattern: the more rigid and load-bearing the rack, the worse it performs in a soft cooler; the more flexible and lightweight the organizer, the better.
How to measure your cooler before you buy anything
A rack or insert only works if it fits without stretching seams or blocking the zipper. Measure four dimensions:
- Interior length, front wall to back wall at the widest point, measured at the base.
- Interior width, side wall to side wall at the base.
- Usable height, from the interior floor to the underside of the closed lid. Subtract at least 1 inch so the zipper can close without pinching.
- Base rigidity, press down firmly in the center of the floor. If it flexes more than about half an inch, the cooler cannot support a freestanding rack.
Any insert should be at least 1 inch smaller than the interior length and width so it drops in without forcing the walls outward.
A five-minute fit test
Before committing to any rack or insert, run this test:
- Place the empty insert in the cooler with the lid open.
- Press down on the center of the insert with your palm. If the cooler floor bows or the walls bulge, the insert is too heavy or too rigid for that cooler.
- Load the insert with the weight you actually plan to carry, a few sandwiches and containers, not bricks.
- Close the zipper. If it drags, catches, or needs two hands to close, the insert is too tall.
- Lift the cooler by its handle and set it down. If the insert shifts more than an inch, it needs a non-slip pad underneath or it should come out.
Pass all five steps and it's safe; fail any one and drop to a lighter option like a divider or rigid tray.
Load limits and weight distribution
Soft cooler bases aren't rated for point loads. Anything over roughly 5 pounds on a small footprint will deform the floor over time; spread across a wide, flat tray, the same weight is fine.
Keep these rules in mind:
- Put the heaviest items directly on the cooler floor, not on top of an insert
- Use a tray or insert that covers most of the base, not a small-footprint rack
- Never let a rack leg or basket corner press into a single point on the fabric
Safe alternatives that actually work
Flexible dividers. Silicone or coated-nylon dividers create compartments without structural load, cost less than a rack, and pack flat.
Waterproof containers and bags. Sealed containers do a rack's job: they keep food out of meltwater.
External support. If you must carry a rigid rack, set the cooler on a flat, hard surface inside a larger tote or crate.
Soft coolers aren't designed for the organization a full rack provides. If you need that level of food protection, a hard-sided cooler is better; if you're committed to a soft cooler, a rigid tray, dividers, and sealed containers are your practical alternatives.
How to Keep Food Dry in a Cooler Without a Rack
Keeping food dry is the core problem racks solve in hard-sided coolers. Without one, use different strategies.
Layer your packing carefully. Start with ice at the bottom, then sealed containers or bags, another ice layer, food, and more ice.
Separate wet items from dry items. Pack drinks and moisture-tolerant items at the bottom, sandwiches, bread, and snacks higher up. This simple rule prevents soggy food even without a rack.
Drain your cooler regularly. On multi-day trips, meltwater builds up.
Pack your cooler in the right order. Cold items first, then ice, then food, then more ice around the sides, then drinks.
Soft Cooler Packing Tips for Maximum Dryness
Soft cooler packing tips work best when you accept the cooler's limitations. The goal isn't to imitate a hard cooler with a rack, it's to keep food out of meltwater using barriers, order, and drainage.
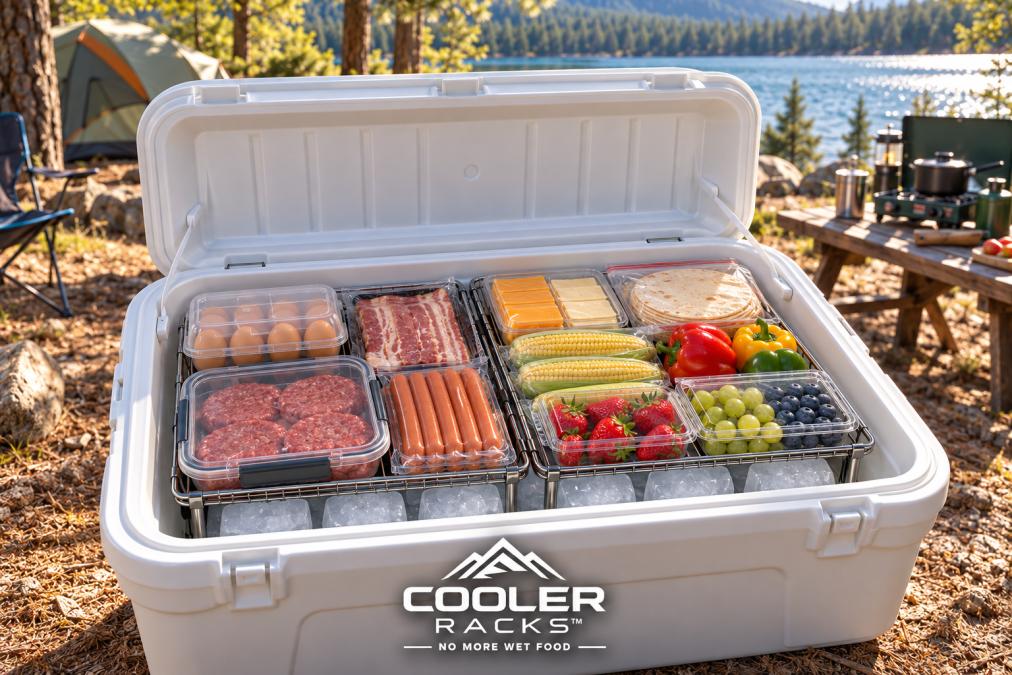
Choose containers that do the rack's job
A rack keeps food above meltwater; in a soft cooler, sealed containers do the same job. Waterproof bags, snap-lid containers, and vacuum-sealed bags all create a barrier. Pack meals and snacks into them before they go in, five minutes of work prevents hours of soggy food.
CR-SS-10 Compact Cooler Rack (10″) →
Pick containers that stack flat. Round ones waste space and roll around; square or rectangular containers pack tighter and stay put.
Pack in this order, bottom to top
- Ice packs or block ice on the floor, the coldest layer sits at the bottom.
- Drinks and items that tolerate moisture, cans, bottles, and sealed beverages.
- Heavy sealed containers, meats, dairy, and prepared meals that need the most cold.
- Lighter sealed containers, vegetables and sides.
- Delicate items on top, bread, chips, and snacks that crush easily.
- A final ice pack across the top if there is room under the lid.
This keeps cold air sinking toward the food that needs it most while delicate items stay away from the weight below.
Leave air space
Soft coolers need air circulation to hold temperature evenly. Overpacking restricts airflow and creates warm pockets, so leave space between items and don't compress the lid on a full load.
Pre-chill the cooler
Put the empty cooler in a cold place overnight, or fill it with ice an hour before packing, then drain and refill. A pre-chilled cooler keeps food colder longer and slows the first melt.
Drain meltwater every morning
If your cooler has a drain plug, open it every morning on multi-day trips. If not, tip it carefully over a sink or away from camp and pour off standing water. Meltwater is the biggest cause of soggy food and builds up faster than most people expect.
Cleaning and food safety
A soft cooler that held raw meat or leaked meltwater needs more than a rinse. After every trip involving raw food, spills, or standing water:
- Empty and drain the cooler completely. Remove every ice pack and container.
- Wash the interior with warm water and mild dish soap. Use a soft sponge, abrasive pads can scratch the liner and create places for bacteria to hide.
- Scrub the zipper track with a soft brush. Food particles and grit collect there and shorten the zipper's life.
- Rinse thoroughly and wipe dry with a clean towel.
- Air dry fully with the lid open before storing. Storing a damp cooler traps moisture and odor.
- Sanitize periodically with a diluted bleach solution (about 1 tablespoon of bleach per gallon of water), then rinse and air dry. Check your cooler's care instructions first, since some liners are not bleach-safe.
Keep wet and dry separated
Pack drinks and items that don't mind moisture at the bottom. Pack sandwiches, bread, and snacks higher up, inside sealed containers. This one rule prevents most soggy-food problems even without a rack or tray.
Ice Packs for Soft Coolers: Best Practices
Ice packs for soft coolers are more practical than loose ice in most situations.
Gel ice packs stay frozen longer than water ice, don't leak as they thaw, and are reusable trip after trip.
Block ice lasts longer than cubed ice.
Frozen water bottles work as ice packs and drinking water. Freeze them the night before. Pack them in your cooler.
Layering ice packs matters.
Replace ice packs as they warm up.
The Hard-Sided Cooler Solution: Why Racks Work Best There
If keeping food dry and organized matters to you, a hard-sided cooler with a proper rack is the real solution.
Hard-sided coolers have rigid walls and solid bases that support a freestanding rack without collapse or sagging.
This is why racks in soft coolers don't work but racks in hard-sided coolers excel: the cooler's design determines whether a rack is viable.
Cooler Racks™ makes two sizes: the CR-SS-10 (10 x 11 x 7 inches) for smaller coolers and the CR-SS-15 (15 x 11 x 7 inches) for larger ones.

Most hard-sided coolers are compatible.
For larger coolers or group trips, combine both sizes.
Conclusion
Soft coolers are convenient for casual outings, but they're not designed for the food organization cooler racks provide. Their flexible structure, soft base, and poor cold-air circulation make traditional racks impractical. Waterproof containers, ice packs, and careful packing are your best options for keeping food dry.
If you're serious about preventing soggy food and organizing your cooler like a fridge, a hard-sided cooler with a proper rack is the real solution. Explore the CR-SS-10 and CR-SS-15 to find the right size for your cooler, and experience the difference a properly organized cooler makes on your next trip.

Frequently Asked Questions
Will a cooler rack fit in a soft-sided cooler?
Most cooler racks are designed specifically for hard-sided coolers and won't work reliably in soft coolers. Soft coolers have flexible sides and lack rigid internal structure, so a rack would sag, shift, or collapse under the weight of food and ice. Hard-sided coolers provide the stable platform that racks need to function properly and keep food elevated.
How do you keep food from getting wet in a soft cooler?
Layer your soft cooler strategically: place ice packs on the bottom, then add a barrier like parchment paper or a thin plastic sheet, then arrange food items on top. Keep perishables in sealed containers or waterproof bags. Use block ice instead of cubed ice when possible, as it melts more slowly. Pack items you'll use first on top so you minimize digging and exposure to meltwater.
Can you use ice packs for soft coolers instead of loose ice?
Yes, ice packs work well in soft coolers and are often better than loose ice. Reusable ice packs eliminate meltwater entirely, reducing soggy food and mess. They also pack more efficiently since they conform to the cooler's shape. Gel packs stay cold for 12-24 hours depending on the brand and ambient temperature, making them ideal for day trips and short camping outings.
What's the best way to pack a soft cooler for a road trip?
Start with a layer of ice packs on the bottom to create a cold foundation. Place a waterproof barrier (parchment paper or a thin plastic liner) over the ice. Arrange food in sealed containers or bags on top, grouping items by meal or use order. Keep drinks separate from food if possible to avoid cross-contamination. Fill remaining gaps with additional ice packs to maintain consistent cooling. Pack items you'll need first on top for easy access.