

Coolers With Ice: How to Pack and Keep Food Dry
Table of Contents
- Coolers With Ice: Why Most Setups End Up Soggy
- How to Pack a Cooler With Ice So Everything Stays Cold
- The Cooler Ice Ratio: How Much Ice You Actually Need
- How Long Does Ice Last in a Cooler?
- How to Keep Food Dry in a Cooler With Ice
- Cooler Rack Sizes and Pricing: Which Setup Fits Your Cooler
- Cooler Maintenance: Drain, Clean, and Store It Right
- Conclusion
- Frequently Asked Questions
Last Updated: October 16, 2026
Coolers With Ice: Why Most Setups End Up Soggy
Coolers with ice fail for one predictable reason: food sits in the meltwater.
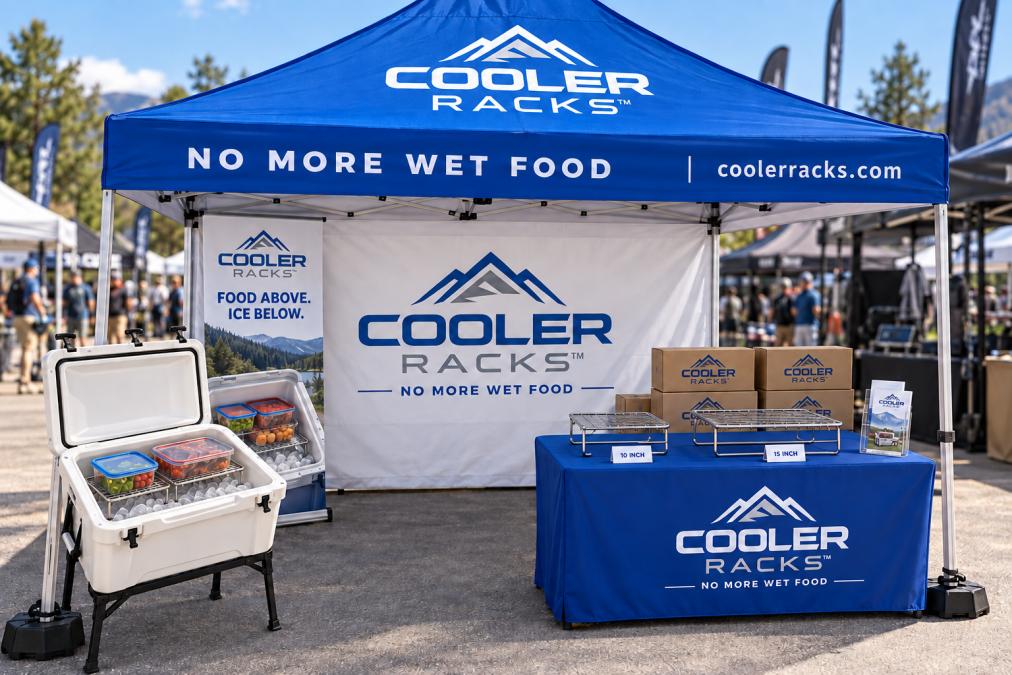
The fix isn't more ice. It's position.
Most people treat a cooler as one big compartment: ice in, food on top, gravity does the rest.
Below, we'll show you how to pack a cooler with ice so everything stays cold and dry, how much ice you need, and which rack setup fits your cooler.

How to Pack a Cooler With Ice So Everything Stays Cold
Packing a cooler with ice comes down to three things: a cold base, an elevated food layer, and minimal air space. Get those right and your cooler behaves like a refrigerator instead of a bathtub.
The order matters more than the technique.
Layer Order: Ice Below, Food Above
Start with a bed of ice on the bottom, cubed for surface contact, block for staying power. Then create a physical barrier between the ice and your food. That barrier separates a dry cooler from a soggy one.
- Bottom layer: Loose ice or block ice, packed tight with as little air as possible
- Middle layer: A rack, shelf, or divider that raises food off the melting ice
- Top layer: Food containers, sandwiches, produce, and anything you want dry
Drinks can go below or beside the food layer. They don't mind getting wet, and cold drinks help hold the temperature down.
The Cooler Ice Ratio: How Much Ice You Actually Need
A common rule of thumb is a 2:1 ratio, two parts ice to one part food and drink by volume. For a multi-day trip, closer to 1:1 works better because the ice has to survive longer.
Here's how we think about capacity planning:
| Trip Length | Ice-to-Content Ratio | Best Ice Type |
|---|---|---|
| Day trip | 2:1 | Cubed ice |
| Overnight | 1.5:1 | Cubed plus block |
| Multi-day | 1:1 | Block ice plus frozen bottles |
| Extended trip | 1:1, replenish daily | Block ice, minimal opening |
The ratio shifts with cooler size, outside temperature, and how often you open the lid. A well-insulated hard-sided cooler holds ice longer than a thin soft-sided bag, so it needs less ice for the same trip.
How Long Does Ice Last in a Cooler?
Ice typically lasts 1 to 3 days in a quality hard-sided cooler, though block ice and frozen water bottles can stretch that further. Duration depends on the cooler, the ice, the weather, and how often you open it, but you can control most of it.
The Four Variables That Decide Ice Retention
Every retention claim you read, ours included, is only true under specific conditions. Here's how each one shifts the clock:
- Ambient temperature. Ice in 70°F shade behaves very differently from the same cooler in 95°F direct sun; a 25°F swing can cut retention by roughly a third. Keep the cooler out of the sun and off hot pavement to buy back hours for free.
- Ice quantity and form. More ice means a larger cold reservoir, but cubed ice melts fastest, block ice slowest, and frozen water bottles sit in between and leave no puddle.
- Opening frequency. Every lid-open dumps cold air and pulls in warm, humid air that melts ice. A cooler opened 20 times a day won't match one opened 4 times.
Ice Form Compared: Cubed, Block, and Frozen Bottles
| Ice Form | Relative Melt Speed | Best For | Trade-offs |
|---|---|---|---|
| Cubed ice | Fastest | Day trips, drinks, surface contact | Melts quickly, creates the most meltwater |
| Block ice | Slowest | Multi-day trips, base of the cooler | Takes up space, harder to source, slower to cool contents |
| Frozen water bottles | Slow | Multi-day trips, drinking water supply | Occupy fixed space, no meltwater, drinkable as they thaw |
| Ice packs / gel packs | Slow | Soft-sided coolers, lunch bags | Reusable, but add no drinking water and take freezer space |
A common pattern is to combine forms: block or frozen bottles at the bottom for staying power, cubed ice on top for fast surface cooling. A mixed load often outlasts an all-cubed load of the same weight.
A Simple Way to Test Your Own Cooler
You don't need a lab to get a real number. Pick a consistent day and run the same test twice.
- Pre-chill the cooler. Add a bag of ice, close the lid, and let it sit for 30 minutes. Dump the meltwater before loading.
- Load a known quantity. Use a fixed amount of ice, say 20 pounds, plus already-cold drinks. Note the ambient temperature and whether the cooler is in sun or shade.
- Log the internal temperature. Place a refrigerator/freezer thermometer or probe thermometer in the middle of the load. Record the reading at the start and every few hours.
- Track the opening count. Write down how many times you open the lid, the variable people underestimate most.
- Note when the ice is gone and when contents warm past 40°F. Those two moments are your real retention numbers.
Run the same test with block ice instead of cubes and you'll see the difference in your own cooler, rather than trusting a marketing claim.
What "Good" Retention Looks Like
As a rough benchmark, a well-insulated hard-sided cooler packed tight with block and cubed ice, kept in shade, and opened a handful of times a day will often hold usable ice into a second day and sometimes a third. A thin soft-sided bag under the same conditions may lose its ice in under a day. If your cooler falls short, the problem is usually air space, warm starting contents, or too much lid-opening, not the cooler itself.
How to Keep Food Dry in a Cooler With Ice
Keeping food dry in a cooler with ice requires physical separation between your food and the meltwater. Water finds the lowest point, so the answer is elevation, not better packing.
This is exactly the problem Cooler Racks™ was built to solve. Our folding 304 food-grade stainless steel racks sit inside hard-sided coolers and hold food 7 inches above the ice.
Elevation Beats Repacking: How a Cooler Rack Works
A cooler rack creates a shelf inside your ice chest. Food goes on top, ice and drinks go underneath, and meltwater drains to the bottom where it can't reach your sandwiches.
The benefits stack up:
Maximum Coverage Cooler Rack System (30″) →
- Food stays dry above the meltwater line
- Contents stay organized like a fridge, so you stop digging through ice
- Drinks stay cold below the rack
One customer from Tucson put it simply: "Game changer. No more soggy sandwiches. My food stays dry, my drinks stay cold."
Cooler Rack Sizes and Pricing: Which Setup Fits Your Cooler
Cooler Racks™ offers four setups, and the right one depends on your cooler's interior length. Measure inside before ordering, since capacity in quarts doesn't tell you whether a rack fits.
| Setup | Rack Sizes | Price | Interior Length Needed |
|---|---|---|---|
| Double Cooler Rack Setup (20″) | Two CR-SS-10 | $54.99 | 20″ |
| Full Cooler System (25″) | One CR-SS-10 + one CR-SS-15 | $59.99 | 25″ |
| Maximum Coverage Cooler Rack System (30″) | Two CR-SS-15 | $64.99 | 30″ |
| CR-SS-15 Full Size Cooler Rack (15″) | One CR-SS-15 | $34.99 | 15″ |
Every setup needs at least 11 inches of interior width and 7 inches of usable interior height.

If you're unsure, start with a single CR-SS-15. You can add a second rack later and combine sizes to organize a larger cooler.
Cooler Maintenance: Drain, Clean, and Store It Right
Maintenance is where most coolers quietly fall apart. Drain the water after every trip, clean the interior before storing, and leave the lid open to dry so mildew doesn't take hold.
Why Meltwater Is the Real Enemy
Standing water in a cooler isn't just a soggy-sandwich problem, it's a food-safety problem. Meltwater carries juices and residue from whatever it touches and pools at the lowest point. If raw meat or poultry has been in the cooler, that water can carry bacteria to anything else it reaches, so drain early and often.
A few habits make a measurable difference:
- Drain before the water gets deep. Meltwater speeds up melting of the ice still in the cooler, so removing it helps the remaining ice last longer.
- Keep raw proteins sealed and at the bottom. Use leak-proof containers or sealed bags, and place them below ready-to-eat food so nothing can drip onto it.
- Use a separate cooler for drinks if you can. Every time someone reaches for a drink, the food cooler stays closed, which protects both temperature and dryness.
Cleaning: What Actually Removes Odor and Mildew
A cooler that smells like last month's catch was usually stored wet. Mildew and odor come from moisture trapped in the liner, lid gasket, and drain channel, cleaning visible surfaces isn't enough if water sits in the seams.
A routine that works:
- Drain meltwater at the end of every trip, ideally before you get home
- Wash the interior with warm water and mild dish soap, avoid abrasive pads that scratch the liner
- Scrub the lid gasket and the drain plug threads, where residue collects
For stubborn odor, a paste of baking soda and water applied to the liner, left a few minutes, then rinsed, works well; diluted white vinegar works similarly.
Drain Plugs, Gaskets, and the Parts That Fail First
The drain plug and lid gasket are the two components most likely to cause problems over time.
- Drain plug. Check that the gasket or O-ring on the plug is intact and seated. A worn or missing seal lets cold air escape and warm air in, which shortens ice retention even when everything else is right. Rinse the threads so grit does not chew the seal.
- Lid gasket. Run a finger along the gasket to feel for cracks, flattening, or debris. A gasket that no longer seals lets the cooler breathe, and no amount of extra ice fixes that.
- Hinges and latches. Tighten or replace as needed. A lid that does not close flush is an open door.
Storing a Rack and a Cooler Between Trips
Stainless steel racks hold up well to this routine. Ours are rust-resistant, food-safe, and have no plastic parts or coatings to crack or peel, and the folding legs stay tight because there's no assembly to loosen. Store the cooler clean and dry with the lid cracked so air can circulate, and store the rack folded and flat so it's ready the moment you pack.
Conclusion
Packing coolers with ice is a positioning problem, not an ice problem. Keep food above the water line, use block ice for staying power, and drain after every trip.
That's the whole idea behind Cooler Racks™. Our folding 304 stainless steel racks hold food 7 inches above the ice, fit 86 cooler models, and collapse flat for storage.
Shop Cooler Racks and stop digging through ice for a dry sandwich.
Frequently Asked Questions
Should food go on top of or below the ice in a cooler?
Food goes above the ice, never below it. Ice melts into water that collects at the bottom, so anything resting there sits in meltwater and turns soggy. Elevate food on a rack that leaves 7 inches of clearance, keep loose ice underneath, and the cold air still circulates upward while your sandwiches and produce stay dry. Drinks can sit in the ice below since cans and bottles are already sealed.
How much ice should you put in a cooler?
A common starting point for coolers with ice is a 2:1 ratio by volume, meaning two parts ice to one part food and drinks. For a multi-day trip, push closer to 2:1 or even 3:1, and plan on roughly 1 to 2 pounds of ice per person per day. Fill empty space with ice rather than air, since trapped air warms faster and shortens your cooling duration.
How long does ice last in a cooler?
There is no single number. Ice retention depends on the cooler's insulation, the outside temperature, how often you open the lid, and whether you use cubed ice, block ice, or frozen water bottles. A well-insulated hard-sided cooler packed with block ice and kept closed can hold ice for several days, while a thin-walled cooler opened often may lose it in under a day. Pre-chilling the cooler helps.
Should you drain melted water from a cooler?
Yes, when you can do it without leaving the lid open long. Meltwater above the ice line speeds up melting and soaks anything sitting in it. Many hard-sided coolers have a drain plug, so tilt the cooler and let the water out at the end of the day. If your food is elevated on a rack, draining becomes optional rather than urgent because nothing is touching the water.
Will a cooler rack work in a soft-sided cooler?
Cooler Racks are designed for hard-sided coolers only. The racks measure 10 x 11 x 7 inches or 15 x 11 x 7 inches and need a rigid interior with at least 11 inches of width and 7 inches of usable height to sit level. Soft-sided coolers flex and collapse, so the rack will not stay stable. Check the Size Guide before ordering to confirm your hard-sided model is compatible.