

Preventing Food Spoilage in Coolers: 7 Practical Steps
Last Updated: October 23, 2026
Quick Summary
Preventing food spoilage in coolers starts with packing order, not ice volume: cold air sinks, so put block ice and frozen bottles on the bottom, raw meat in sealed containers just above the ice, and fragile food on top away from meltwater. Keep the cooler interior at 40°F or below and discard perishables left above 40°F for more than two hours.
- Pack block ice or frozen bottles in a single layer on the cooler bottom, with raw meat sealed directly above.
- Keep cooler interior at 40°F or below and frozen goods at 0°F or below.
- Block ice outlasts cubed ice because cubes melt faster due to greater surface area.
- Fill the cooler at least two-thirds full and pre-chill it with a bag of ice for an hour.
- Dry the cooler fully before storage and check the lid gasket every month.
Table of Contents
- Step 1: Pack Your Cooler in the Right Order
- Food Safety Temperatures for Coolers
- How Long Does Food Last in a Cooler?
- Cooler Ice Packing Methods That Keep Food Cold
- Preventing Cross-Contamination in a Cooler
- Loading Diagrams and Air Circulation
- Signs of Spoiled Food and Cooler Maintenance
- Conclusion
- Frequently Asked Questions
Step 1: Pack Your Cooler in the Right Order
Preventing food spoilage in coolers starts with packing order, not ice volume. Cold air sinks, so the coldest items belong at the bottom and your most fragile food belongs on top, away from meltwater.
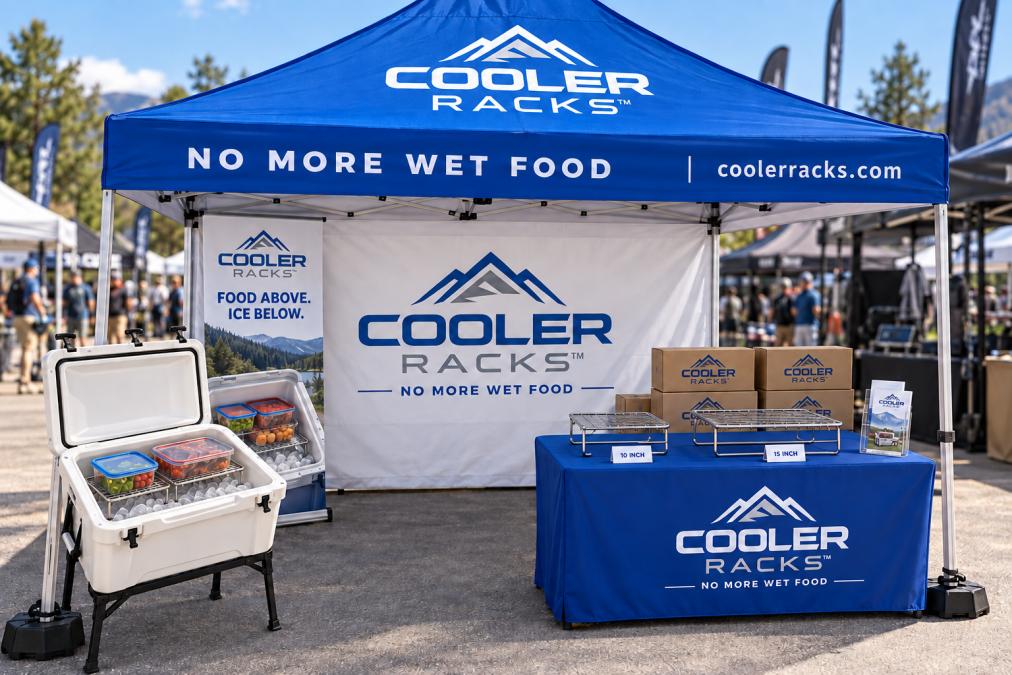
Here is the order we recommend:
- Block ice or frozen bottles on the bottom, in a single layer
- Raw meat and seafood in sealed containers directly above the ice
- Drinks tucked into the gaps along the sides
- Dairy and cooked food in the middle layer
- Produce, sandwiches, and snacks at the very top
At Cooler Racks™, our folding 304 stainless steel racks are designed to hold food above the ice line. The 7-inch legs allow meltwater to drain through the 2 x 2-inch grid instead of soaking your lunch.

One common mistake: packing warm food straight from the stove. Let it cool first, or you will melt your ice from the inside out.
Food Safety Temperatures for Coolers
The temperature danger zone is 40°F to 140°F. Pathogenic bacteria multiply fastest in that range, which is why food safety temperatures for coolers matter more than most campers realize.
Keep these targets in mind:
- Cooler interior: 40°F or below
- Frozen goods: 0°F or below
- Hot food: above 140°F until served
- Discard window: any perishable item left above 40°F for more than two hours
A cheap dial thermometer beats guesswork. The USDA Food Safety and Inspection Service guidance on the danger zone confirms the two-hour rule, and it applies at a campsite just as much as in a kitchen.
Calibrate your thermometer at the start of each season. Fill a glass with ice water, stir, and check that it reads 32°F.
How Long Does Food Last in a Cooler?
How long food lasts in a cooler depends on three things: ice quality, cooler insulation, and how often you open the lid. Actual cooling duration depends on the cooler, ice, weather, and use.
Here is a rough guide:
| Food Type | Safe Cooler Life | Notes |
|---|---|---|
| Raw meat and poultry | 1-2 days | Keep sealed and at the bottom |
| Cooked leftovers | 3-4 days | Cool fully before packing |
| Dairy and eggs | 2-3 days | Keep away from the lid |
| Fresh produce | 3-5 days | Some items tolerate cold poorly |
| Sandwiches and snacks | 2-3 days | Must stay dry |
Block ice outlasts cubed ice every time. Cubes melt faster because of the greater surface area, and that meltwater is exactly what ruins sandwiches.
Every lid opening dumps cold air. Plan your meals so you open the cooler once, grab everything, and close it.
Cooler Ice Packing Methods That Keep Food Cold
Cooler ice packing methods fall into two camps: loose ice and block ice. Loose ice chills faster and fills gaps well. Block ice lasts longer and produces less meltwater.
Our preferred setup is what we call Fridge Mode™: a layer of block ice on the bottom, drinks packed around it, and a stainless steel rack holding food above the ice line. No electricity, no soggy bread.

A few rules that make any method work better:
- Fill the cooler at least two-thirds full. Empty space is wasted cold air.
- Pre-chill the cooler with a bag of ice for an hour before loading.
- Line the bottom with a towel or newspaper for extra insulation.
- Keep a separate small cooler for drinks so the main lid stays shut.
- Freeze water bottles and use them as ice you can drink later.
Preventing Cross-Contamination in a Cooler
Preventing cross-contamination in a cooler comes down to separation and sealing. Raw meat juices are the main culprit, and they travel fast in meltwater.
Follow these habits:
- Seal raw meat in leakproof containers, never loose plastic bags
- Store raw meat below cooked food, always
- Use separate coolers for raw meat and ready-to-eat items when possible
- Wipe down the interior between trips with hot soapy water
- Never reuse a container that held raw meat without washing it
Moisture control matters too. Water spreads bacteria across every surface it touches, which is why keeping food out of cooler water is a food safety issue, not just a texture problem.
CR-SS-10 Compact Cooler Rack (10″) →
The FDA advice on separating raw foods during storage makes the same point for refrigerators, and a cooler is simply a refrigerator without a compressor.
Loading Diagrams and Air Circulation
Air circulation is the invisible variable in cooler performance. Cold air needs room to move around your food, and a cooler packed solid with no gaps will develop warm pockets.
Picture your cooler as three zones, each with its own airflow job:
- Bottom zone: ice and drinks, packed tight. This is your cold reservoir. Pack drinks and frozen bottles shoulder to shoulder so they hold each other cold and leave fewer air gaps to chill.
- Middle zone: sealed containers of meat and dairy, arranged in a single layer with a finger-width gap between containers. That gap is the return path for cold air sinking down the walls.
- Top zone: food on an elevated rack, with air flowing underneath. The rack is what turns a dead air pocket into a convection loop.
That gap under the food is doing real work. Cold air sinks along the cooler walls, slides under the rack, and rises through the gaps between containers as it warms.
A simple loading diagram to follow:
- Bottom layer: block ice or frozen bottles in a single, tight layer.
- Side channels: leave a 1- to 2-inch clear channel down one long side of the cooler. This is the cold-air down-flow path.
- Middle layer: sealed containers in a single layer, not stacked, with small gaps between them.
- Rack layer: the stainless rack spanning the cooler, with food on top and open air beneath.
- Top layer: lightweight produce and sandwiches, kept away from the lid where warm air collects.
Storage density is a trade-off. Pack too loose and you waste cooling power because every empty space is air your ice has to chill.
One more mechanism worth knowing: every time you open the lid, the cold air pooled at the bottom spills out and is replaced by warm ambient air. A cooler packed with solid mass (ice, drinks, sealed containers) has less air to exchange, which can help maintain temperature. That is the real argument for filling your cooler two-thirds full, not just thermal mass, but less air to re-chill after every lid opening.
Signs of Spoiled Food and Cooler Maintenance
Spotting spoiled food early is a skill, and it starts with your senses. Trust them over the calendar, but know what each sense is actually telling you.
Watch for these signs, grouped by what they mean:
- Smell: sour, ammonia-like, or simply "off." Ammonia usually points to protein breakdown in meat or poultry; a sour note in dairy means lactic acid bacteria have taken over.
- Texture: slimy meat, sticky produce, cloudy liquids. A tacky film on meat is a bacterial biofilm, it does not rinse off, so do not try to save it.
- Color: gray or green patches on meat, dark spots on cheese, brown edges on cut produce. Color shifts on their own are not always spoilage, but combined with smell or texture they are a clear discard signal.
- Packaging: bulging lids or leaking seals. A bulging lid means gas-producing bacteria are active inside, discard without opening.
- Ice: cloudy meltwater with floating debris. That debris is food solids and bacteria that have left their containers.
If anything looks doubtful, throw it out. Foodborne illness on a camping trip is a miserable way to spend a weekend, and the cost of a discarded sandwich is trivial next to a clinic visit.
Cooler maintenance is the angle most guides skip. A dirty cooler grows bacteria between trips, and that film transfers straight to your food.
A cleaning schedule that actually works:
- After every trip: empty, drain, and wash the interior with hot soapy water. Pay attention to the lid gasket and the drain plug, the two places moisture hides.
- Weekly during heavy use: wipe down with a dilute bleach solution (about 1 tablespoon of unscented household bleach per gallon of water), then rinse and dry fully.
- Monthly: inspect the gasket for cracks and mold, and check the drain plug for a tight seal. A cracked gasket leaks cold air and lets meltwater seep into the insulation.
- Seasonally: deep clean the drain plug channel and leave the lid cracked for storage so air moves and mildew does not form.
Conclusion
Keeping food cold and dry in a cooler is a system, not a single trick. Pack in the right order, hold the danger zone line, separate raw from ready-to-eat, and clean the cooler like you mean it.
Cooler Racks™ was built for exactly this problem. Our folding 304 stainless steel racks elevate food 7 inches above the ice, so meltwater drains away and sandwiches stay dry. They are rustproof, dishwasher safe, and verified to fit 86 cooler models, with the CR-SS-10 at $29.99 and the CR-SS-15 at $34.99.
Frequently Asked Questions
What temperature should a cooler stay at to keep food safe?
Keep the interior at 40°F or below, which is the cold-holding limit set by U.S. food safety standards. Above that, pathogenic bacteria multiply fast. Use a thermometer, not your hand, to check. Block ice and a full cooler hold temperature better than loose cubes and empty space. Once ice melts into water above 40°F, perishable goods should be eaten or moved to refrigeration. Replenish ice before the cooler climbs above that line.
How long does food last in a cooler?
With the cooler held at 40°F or below, the duration food stays safe depends on factors like ice quality, cooler insulation, and how often the lid is opened. Raw meat and poultry should be cooked or kept iced continuously. Leftovers last 3 to 4 days only if the cooler stays cold the whole time. Once the interior rises above 40°F for more than 2 hours, discard perishable items. A thermometer reading at each opening tells you whether the cold chain held.
Should food be kept above ice in a cooler?
Yes. Melted ice turns into standing water that soaks sandwiches, produce, and packaging, and it spreads bacteria between items. Elevating food above the ice line keeps it dry and lets cold air move underneath. A stainless steel cooler rack such as the CR-SS-15 Full Size Cooler Rack (15 x 11 x 7 inches, $34.99) holds food 7 inches above the ice while loose cubes pass through the grid. Drinks stay cold below.
How can you tell if food in a cooler has spoiled?
Check three things: temperature, smell, and texture. If the cooler has been above 40°F for more than 2 hours, treat perishable food as unsafe. Sour or ammonia-like odors, slimy surfaces, discoloration, or swollen packaging are signs of bacterial growth. Never taste food to test it. When in doubt, throw it out; foodborne illness from spoiled food costs far more than a replacement meal.
Ready to stop digging through ice? Shop Cooler Racks™ and keep your food dry, organized, and easy to grab on every trip.
