

The Complete Guide to Hard Sided Cooler Food Storage
Quick Summary
A hard sided cooler keeps food dry by placing a rack above the ice and meltwater, with block ice and drinks below. Pre-chill the cooler, pack block ice first, and keep raw meat isolated in the lowest spot. Use a probe thermometer and keep food at or below 40°F.
- Pre-chill the cooler overnight with ice and drain the water before loading.
- Add block ice first, since it generally melts more slowly than cubed or crushed ice.
- Set the rack so its legs rest on the floor or block ice, letting meltwater drain past food.
- Keep raw meat sealed in the lowest spot so juices cannot drip onto ready-to-eat food.
- Discard perishable food held above 40°F for more than two hours, or one hour above 90°F.
Table of Contents
- What Hard Sided Cooler Food Storage Actually Involves
- How to Keep Food Dry in a Cooler
- Choosing the Best Hard Sided Cooler Food Storage Containers
- Food Safety Temperatures and How Long Food Stays Cold
- Sizing a Large Hard Sided Cooler for Food Storage
- Using a Hard Sided Cooler With Lid and Organized Storage
- Cleaning, Odor Control, and Maintenance Between Trips
- Setting Up Your Cooler Rack Before Your Next Trip
- Frequently Asked Questions
Keeping food dry in a hard-sided cooler is one of those problems everyone has faced and few people solve well. Melted ice seeps into the bottom, sandwiches turn soggy, and by day two you're digging through cold water for a bag of grapes. Cooler Racks™ builds folding 304 food-grade stainless steel racks that lift food above the ice and meltwater, so your food stays dry while drinks and ice stay where they belong, underneath. This guide walks through how that setup works, how to choose the right size, and how to keep food safe on longer trips.
Last Updated: November 3, 2026
What Hard Sided Cooler Food Storage Actually Involves
Hard sided cooler food storage means organizing what you pack so perishable items stay dry, cold, and separated from ice melt. A cooler is designed to hold cold, not to protect food from water, so the job falls to you.
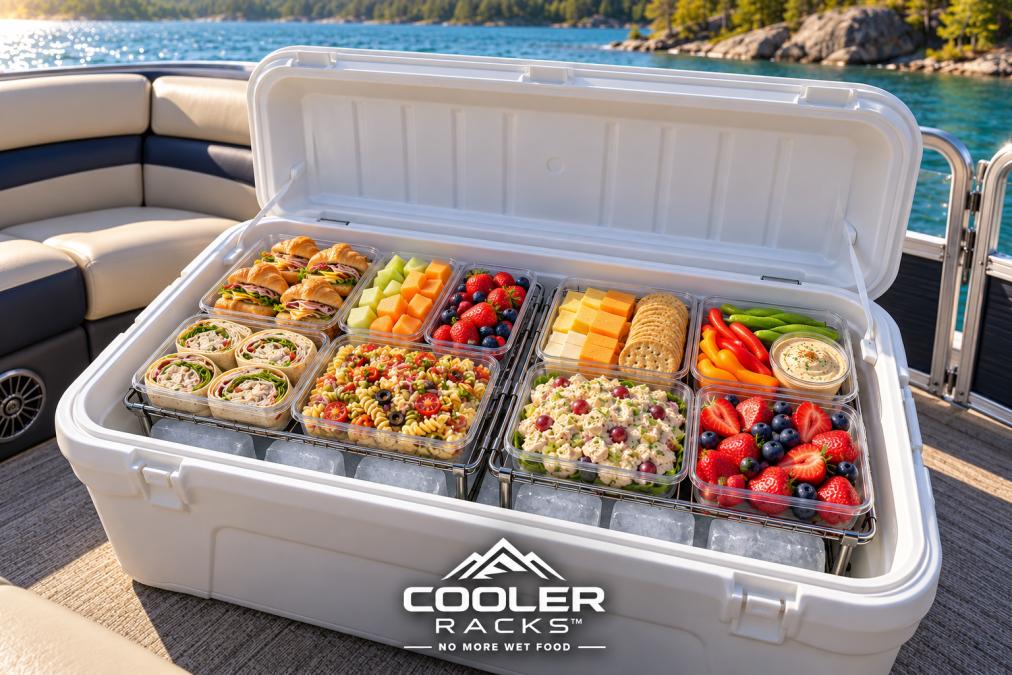
In practice, good storage has three parts: a dry zone for food, a cold zone for drinks and ice, and a clear path to grab items without opening the lid more than necessary. A rack creates the dry zone. Ice, drinks, and bulky items fill the space below.
A common mistake is treating the cooler as one open pit. Everything sinks into the same meltwater, and labels peel off within a day. Separating the layers solves both problems at once.
How to Keep Food Dry in a Cooler
Keeping food dry is a packing method.
Step 1: Pre-chill the cooler. A warm liner melts ice fast and creates more meltwater.
Step 2: Add block ice first. Block ice generally melts more slowly than cubed or crushed ice, so it belongs at the bottom.
Step 4: Pack drinks below the rack. Cans, bottles, and juice boxes go in the space under and around the rack.
Ice-to-food ratio. These are general starting points, not rules; a probe thermometer tells you what is actually happening inside.
Watch out: Packing food directly on top of loose ice invites leaks through sealed bags and turns sandwiches soggy.
Choosing the Best Hard Sided Cooler Food Storage Containers
Hard sided coolers and their storage accessories come in many forms, and the right pick depends on how you travel. Four rack options are available, each built for a different load:
- CR-SS-10 Compact Cooler Rack (10" x 11" x 7", $29.99): Fits smaller coolers and lunch-sized loads. It is the simplest choice for a day trip or a two-person cooler.
- CR-SS-15 Full Size Cooler Rack (15" x 11" x 7", $34.99): Gives more elevated room for meals and snacks in a standard cooler.
- Full Cooler System (25", $59.99): A bundle pairing a compact and a full-size rack for two elevated food areas in a longer cooler.
- Maximum Coverage Cooler Rack System (30", $64.99): Two full-size racks for large coolers serving a group.
| Option | Price | Best For | Trade-off |
|---|---|---|---|
| CR-SS-10 | $29.99 | Day trips, small coolers | Limited food area |
| CR-SS-15 | $34.99 | Standard coolers, weekends | One elevated level |
| Full Cooler System | $59.99 | Longer trips, mixed loads | Requires a longer cooler |
| Maximum Coverage | $64.99 | Groups, tailgates | Needs a large cooler |
Best for: Campers and families who want organized food without digging. Skip if: You only carry drinks and never pack perishable food.

Before buying, confirm that the interior measurements of your cooler match the rack. Choose by usable interior size, not by the cooler's advertised capacity.
Food Safety Temperatures and How Long Food Stays Cold
Dry food is not automatically safe food.
How long food stays cold depends on four things: the cooler's insulation, the amount and type of ice, the outside temperature, and how often the lid opens. A well-packed hard-sided cooler with block ice can hold safe temperatures for a day or two in mild weather, but results vary widely by cooler and conditions. Do not rely on a fixed number of hours; check the food itself.
Use a probe thermometer. An inexpensive digital probe thermometer is the only reliable way to know whether food is still safe.
Safe storage duration by food type. These are practical starting points, not guarantees:
- Raw meat, poultry, and seafood: Keep at 40°F or below and use within one to two days of packing. Keep sealed and isolated from ready-to-eat food.
- Deli meat and prepared salads: Use within three to five days if held consistently at 40°F or below.
- Dairy (milk, cheese, yogurt): Use within two to three days when held cold; hard cheese keeps longer than soft cheese and milk.
- Cooked leftovers and prepared meals: Use within three to four days when held at 40°F or below.
- Fresh produce: Most whole produce keeps several days; cut produce should be treated like prepared food and used within two to three days.
- Condiments and drinks: Generally tolerant of cooler conditions, but keep opened dairy-based dressings cold.
When to discard. Throw out any perishable food that has been held at unsafe temperatures for too long.
Keep the cold chain intact. Open the lid as little as possible, pull out only what you need for each meal, and close it again immediately.
Watch out: A cooler that feels cold on the outside can still have warm spots near the lid or against the walls. Check the food, not the cooler.
Sizing a Large Hard Sided Cooler for Food Storage
Picking the right rack size starts with measuring, not guessing. Cooler Racks™ lists the minimum interior dimensions for each product. A compact rack needs at least 10 inches of interior length, 11 inches of width, and 7 inches of usable height. A full-size rack needs at least 15 inches of length with the same width and height.
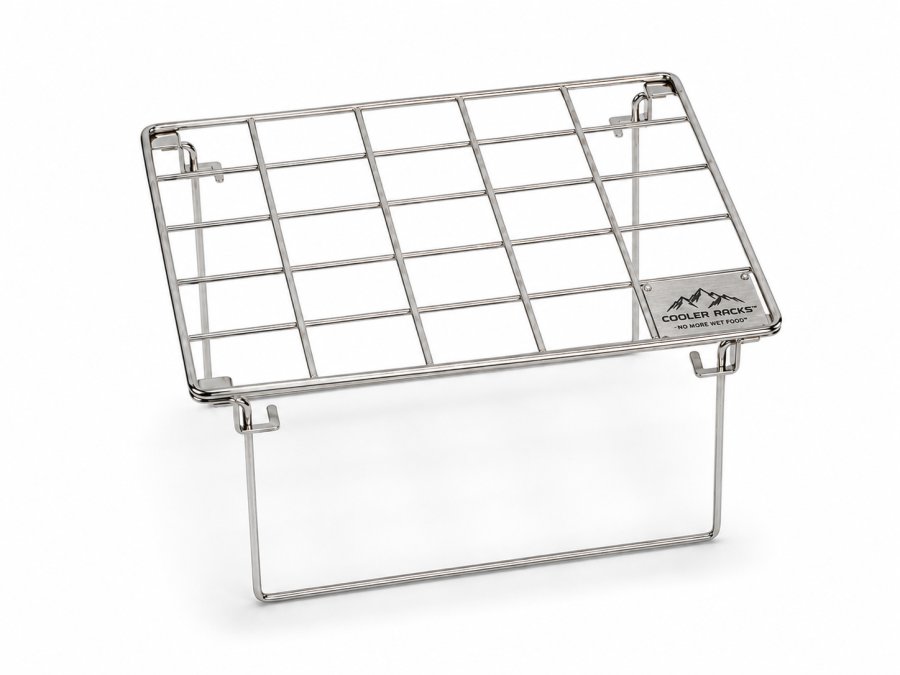
Measuring Usable Interior Space
Measure inside the cooler, from wall to wall, at the level where the rack will sit. Note the height from the cooler floor to the lid's underside, then subtract any lid lip or divider. Usable height matters most: a rack that fits the footprint but not the height will not sit properly.
Capacity Planning for Meals and Trip Length
Plan food capacity by meals per day, then choose the rack that holds one day's dry food. For a family of four on a weekend trip, a full-size rack for sandwiches and snacks plus a compact rack for produce is usually enough. Longer trips call for the bundled systems, so you can separate breakfast from dinner and keep both reachable.
Using a Hard Sided Cooler With Lid and Organized Storage
Once the cooler is sized, set it up in order. Place the rack first, then add block ice, then pack drinks in the space below. Load food on the rack last, so it stays on top where you can reach it.
Organize by meal. Put tomorrow's breakfast items at the top, and keep the next meal's food near the lid. This reduces digging and keeps the lid closed longer.
Keep raw meat separate from ready-to-eat food, and store it in the lowest spot where juices cannot drip down. A sealed bag on the bottom, below the rack, is the safest arrangement.
Cleaning, Odor Control, and Maintenance Between Trips
Clean the cooler and rack after every trip. The 304 stainless steel rack is dishwasher-safe and easy to wipe down, but the cooler's liner needs attention too. Wash both with warm water and mild soap, then rinse well.
Sanitize surfaces using a food-safe cleaning method, then air-dry. Leave the lid open between trips so air circulates and trapped moisture does not cause odor.
Store the cooler with the lid slightly ajar to allow air circulation.
Setting Up Your Cooler Rack Before Your Next Trip
Before your next trip, measure your cooler, choose a rack that fits, and run through a test pack at home.
Pack the night before, pre-chill the cooler, and bring extra block ice for longer days. With your food on an elevated rack and drinks cold below, the cooler works the way it should.
Ready to set up your own system? Shop Cooler Racks™ to find the right size for your cooler and keep your food dry from the first meal to the last.
Frequently Asked Questions
How should you pack food in a hard-sided cooler?
Place a stainless steel rack or similar elevated tray inside the cooler and put sandwiches, produce, and sealed containers on top, where meltwater cannot reach them. Put block ice or the heaviest cold items on the bottom, below the rack, so cold air sinks and keeps the upper level cool. Keep drinks in the lower section with the ice. Pack items in the order you will need them, and keep the lid closed as much as possible to hold the temperature.
How do you keep food from getting wet in a cooler?
Keep food out of the meltwater. Melting ice produces water that pools at the bottom and soaks anything resting in it, so elevating food above the ice line is the most reliable fix. Store food in sealed, leak-resistant containers or zip bags, freeze water bottles to act as ice, and drain meltwater through the drain plug when it gets high. Using a rack with a 2 x 2-inch grid lets loose ice pass through while the food stays dry.
Should food go on top of or under the ice in a cooler?
Ice belongs on the bottom and around the sides, with the food placed above it. Cold air sinks, so ice below and beside perishables keeps them colder than ice on top would. Food that sits directly on ice can freeze or get wet, and placing it above the ice line on a rack solves both problems. Use block ice for longer holding times, since it melts more slowly than cubed ice.
What containers are best for storing food in a hard-sided cooler?
Sealed, rigid containers and zip-top bags work best because they resist leaks and keep food from touching meltwater. Choose containers that stack and fit the usable interior dimensions of your cooler so no space is wasted. Label containers with dates and contents, and keep raw meat sealed and separated from ready-to-eat foods to reduce cross-contamination.
How do you organize food and drinks in a large cooler?
Split the cooler into two zones. Use an elevated rack or shelf for food, and keep drinks, raw meat, and ice in the lower section. Pack the most-used items near the lid so you do not dig through the whole cooler. A rack set that uses two full-size or compact racks creates two elevated food areas, which works well for families or groups who open the cooler often.
Can you use a rack to keep food above melted ice in a cooler?
Yes. A folding stainless steel rack sits inside the cooler and holds food above the ice and meltwater, while drinks and ice stay underneath. Racks sized to your cooler interior, such as the 10-inch and 15-inch Cooler Racks options, give you a dry food level without losing cold storage. Make sure the rack fits the usable interior height and length before buying, and measure your cooler first.
How long can food stay cold in a cooler?
Holding time depends on the cooler, the amount and type of ice, outdoor temperature, and how often the lid is opened. Keep perishable food cold and consult U.S. Food and Drug Administration guidance on safe holding temperatures and times. Use a cooler thermometer to check conditions on longer trips.
How do you pack a cooler for a camping trip?
Pre-chill the cooler and the food before packing. Place block ice on the bottom, set the rack above it, and load food on the rack in the order you will use it. Keep drinks in the lower section and keep the lid closed during the day. Plan the number of ice packs and the cooler size around how many meals and days you will be away, and drain meltwater as the trip goes on.
