

How to Keep Drinks Cold Without Ice: 7 Proven Methods
Last Updated: November 7, 2026
Quick Summary
To keep drinks cold without ice, pre-chill the drinks and container, then rely on insulation and frozen water bottles instead of ice. Pack the cooler full, place frozen bottles at the bottom, and store it in shade or indoors. A well-packed cooler with frozen bottles can hold cold for many hours.
- Pre-chill drinks, mugs and tumblers before you leave so they stay cold far longer.
- Fill every gap in the cooler, because air warms faster than liquid or food.
- Put frozen bottles and gel packs at the bottom, since cold air sinks.
- Keep the cooler lid closed and store it indoors, away from sun and heat.
- Never freeze sealed carbonated cans or glass bottles solid, as they can burst.
Table of Contents
- Why Ice-Free Cooling Works and When to Use It
- How to Cool a Drink Quickly Without Ice
- How to Keep Drinks Cold All Day
- How to Keep Drinks Cold Without a Fridge or Ice
- How to Keep Drinks Cold Overnight
- How Long Each Method Keeps Drinks Cold
- Food Safety and Freezer Timing
- Build a No-Ice Cooler Setup with Cooler Racks
- Frequently Asked Questions
Why Ice-Free Cooling Works and When to Use It
Ice-free cooling works by slowing heat transfer, not by adding cold. Insulation, pre-chilled containers, and frozen objects all buy time. That is the whole game.
Many campers and boaters assume ice is the only answer. It isn't. Ice is just the cheapest, messiest option.
Here is the core idea. A drink warms up when heat moves into it from the air, the sun, or your hand.
When to skip ice entirely:
- You have no freezer access on the road
- Meltwater would ruin food or gear
- You want a light pack for a day hike
- You are cooling drinks for a short window, not a week
The trade-off is real. Ice-free methods hold cold for hours, not days. If you need multi-day storage, ice still wins.
For a deeper look at when ice actually beats ice-free setups, see our guide on using block ice for food storage.
How to Cool a Drink Quickly Without Ice
Rapid chilling and long-term holding are different problems, and most advice blurs them.
The physics is simple. Heat moves from the drink through the container wall into whatever surrounds it.
Ranked by realistic speed, from fastest to slowest:
- Cold water bath with salt. Submerge the can or bottle in a bowl of cold tap water. Stir in a handful of table salt; salt lowers the water temperature and keeps it liquid below the normal freezing point, so the bath stays colder longer. A thin-walled can in a salted ice-water bath is generally one of the faster home methods. Stir the water every few minutes so the cold layer does not stratify around the can.
- Wet wrap plus moving air. Wet a paper towel or thin cloth, wring it so it is damp but not dripping, and wrap the container. Put it in front of a fan or hold it out a car window while driving. Evaporation pulls heat from the drink. Dry air and wind accelerate it; humid, still air slows it to a crawl. This is slower than a water bath but works when you have no bowl.
- Spin or roll the container. Rotation keeps the drink mixed and exposes new liquid to the cold container wall. A wet, spinning can chills noticeably faster than a still one. Roll a bottle between your palms or spin a can on a counter for a few minutes.
- Bury it in cold, wet sand or soil. At a beach or campsite, dig a hole in shaded ground, nestle the container in, and pack damp sand or soil around it. Evaporation from the damp ground plus the cooler subsurface temperature pulls heat out. Keep it out of direct sun.
- Freezer sprint, carefully. A short blast in a freezer works, but it is the method most likely to go wrong. Set a timer and do not walk away.
Watch out: Never leave a sealed carbonated can in a freezer unattended, because it can rupture as the liquid expands.
A few starting conditions change the math. A drink that starts at room temperature takes far longer to chill than one pulled from a cool garage.
For keeping a drink cold after it is chilled, the methods in the next sections matter more than any of these speed tricks.
How to Keep Drinks Cold All Day
Keeping drinks cold all day comes down to three things: a good insulated container, a full load, and shade. A half-empty cooler loses cold fast because air warms quicker than liquid.
Start with the container. An insulated tumbler or a double-walled glass holds cold far longer than a thin plastic cup. Pre-chill it with cold water for a few minutes before pouring.
Then reduce exposure:
- Keep the cooler closed between pours
- Park it in shade, never in direct sun
- Fill empty space with frozen water bottles
- Group cold drinks together so they cool each other
Frozen water bottles can chill drinks, then melt into drinking water later.
Ambient temperature decides how long any of this lasts. A cooler in beach sun loses cold much faster than one under a shade tree.
How to Keep Drinks Cold Without a Fridge or Ice
Without a fridge or ice, you rely on insulation and pre-chilling. The goal shifts from adding cold to keeping the cold you already have.
Here is the sequence we recommend:
- Pre-chill everything. Chill drinks in a fridge or freezer before you leave. A cold drink stays cold far longer than a warm one.
- Freeze the drinkware. Put mugs, glasses, or tumblers in the freezer the night before.
- Load frozen bottles. Fill reusable bottles with water and freeze them solid.
- Pack tight. A full cooler holds cold better than a half-empty one.
- Add a barrier. A folded towel or a rack on top slows heat gain.
Reusable ice cubes and chilling stones help here too. They stay cold, and they never dilute the drink. Freeze them ahead and rotate them between drinks.
For anyone packing food alongside drinks, our guide on keeping food out of cooler water covers the barrier tricks that keep both dry.
How to Keep Drinks Cold Overnight
Overnight is where ice-free setups earn their keep, and it is also where the food-safety and freezer-timing mistakes happen.
Set it up before bed:
- Pre-chill the cooler. Put a bag of frozen items or a few frozen water bottles inside for an hour before loading. A cooler that starts cold holds cold longer.
- Fill every gap. Empty space is air, and air warms faster than liquid or food. Top off with frozen water bottles, and stuff towels or crumpled newspaper into the remaining gaps.
- Layer correctly. Frozen bottles and gel packs go at the bottom; drinks and food go above them. Cold air sinks, so the cold source belongs low.
- Keep the lid closed until morning. Every peek lets warm air in and pushes cold air out.
- Store indoors. A cooler in a hot garage or on a sunny porch loses cold far faster than one in a cool interior room.
Watch out: Do not freeze sealed carbonated cans or glass bottles of liquid solid.
Food safety drives the rest. Food safety guidance from U.S. federal agencies advises keeping cold food at 40°F or below. Check the USDA and FDA websites for current recommendations.
A few timing rules that actually help:
- Freeze water bottles the night before, not the morning of. A bottle frozen solid overnight holds far more cold than one chilled for an hour.
- Never refreeze food that has fully thawed. If something thawed overnight, treat it as fresh food and cook or eat it rather than putting it back in the freezer.
- Keep raw meat below and separate from ready-to-eat food, and use a rack or barrier so meltwater cannot drip onto anything.
Frozen fruit is a smart overnight option for drinks specifically.
For a step-by-step approach to protecting food alongside drinks, see our guide on preventing food spoilage in coolers.
How Long Each Method Keeps Drinks Cold
How long a drink stays cold depends on the method, the container, and the starting temperature. Here is a practical comparison by use case.
| Method | Rough Hold Time | Best For | Dilution Risk |
|---|---|---|---|
| Insulated tumbler | Several hours | Commutes, desk, day trips | None |
| Double-walled glass | A few hours | Home, patio, serving | None |
| Reusable ice cubes | A few hours | Parties, cocktails | None |
| Chilling stones | Under an hour | Whiskey, short pours | None |
| Frozen fruit | A few hours | Punch bowls, pitchers | Slight |
| Frozen water bottles | Many hours in a cooler | Camping, road trips | None until melt |
| Pre-chilled cooler, no ice | Many hours | Overnight, multi-day base camp | None |
The pattern is clear. Insulated drinkware wins for single drinks. Frozen bottles and a packed cooler win for groups.
Frozen mugs and a chilled glass help at the margins. They buy time, not days.
Food Safety and Freezer Timing
Food safety and freezer timing matter as much as drink temperature. A cold drink is easy. Keeping food safe without ice takes planning.
Two rules drive everything:
- Keep cold food cold, and do not let it sit in the danger zone
- Never refreeze food that has fully thawed
Timing tips that actually help:
- Freeze water bottles the night before, not the morning of
- Pre-chill the cooler with a bag of frozen items for an hour
- Pack frozen items at the bottom, drinks and food above
- Use a rack to lift food off the meltwater
That last point is where most setups fail. Meltwater soaks sandwiches and produce, and soggy food goes bad faster. Keeping food elevated solves it.
For a step-by-step approach to protecting your food, read our guide on preventing food spoilage in coolers.
Build a No-Ice Cooler Setup with Cooler Racks
A no-ice cooler setup works best when food sits above the cold source and drinks sit below it. That is exactly what our racks are built for.
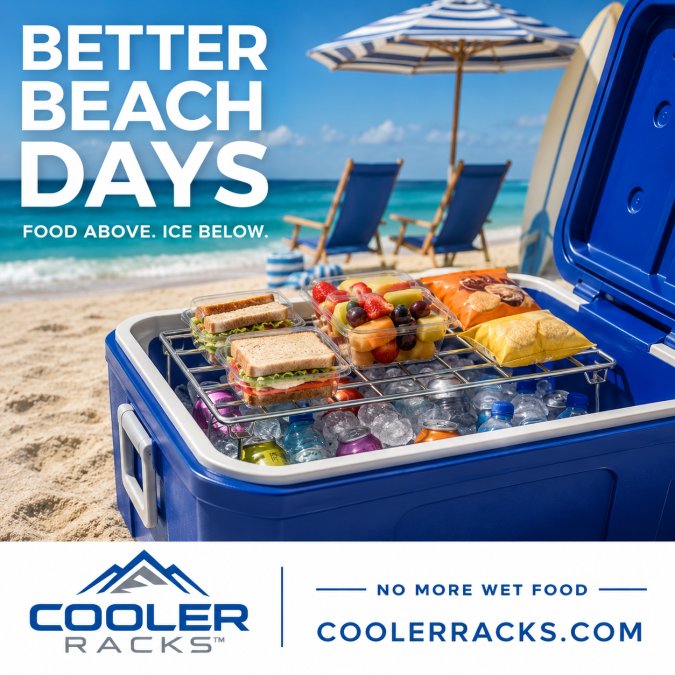
Cooler Racks™ makes folding 304 food-grade stainless steel racks that lift food above ice and meltwater inside hard-sided coolers. The stainless steel legs help transfer cooler temperature.
How we would set it up:
- Place frozen bottles or block ice at the bottom of the cooler.
- Set the rack on top using the folding legs.
- Load food on the rack. Sandwiches, produce, and containers stay dry.
- Pack drinks underneath around the cold source.
- Close the lid and leave it closed.
Our racks come in two sizes, CR-SS-10 at 10 x 11 x 7 inches and CR-SS-15 at 15 x 11 x 7 inches. Both give 7 inches of elevation and are verified to fit 86 cooler models. The 2 x 2-inch grid lets loose ice pass through.
To understand what a rack does in practice, see what a cooler rack is used for. Our review of folding cooler racks for hard coolers breaks down the sizes.
As one customer from Ann Arbor, MI put it, "Now everything is dry, organized, and easy to grab."
Keeping drinks cold without ice is a planning problem, not a gear problem. Pre-chill what you can, insulate what you can't, and keep food off the meltwater.
Cooler Racks™ makes that last part simple.
Frequently Asked Questions
How to get a drink cold without ice?
Wrap the bottle or can in a wet paper towel and place it in the freezer for a short time, checking often. The evaporating water pulls heat from the drink faster than cold air alone. For a quicker chill, submerge the container in a bowl of cold tap water with a handful of salt, which lowers the water temperature. A pre-chilled insulated tumbler also keeps a drink cold for hours without any ice.
How to keep drinks cold all day without ice?
Start with drinks that are already cold from the refrigerator, then pack them in an insulated cooler or tumbler. Add reusable ice cubes, frozen water bottles, or frozen fruit to absorb heat. Keep the cooler out of direct sun and avoid opening it often. A hard-sided cooler with a tight lid and a stainless steel rack to organize contents will hold cold air better than a soft bag, especially on hot days.
Can a wet paper towel chill a drink?
Yes. A wet paper towel wrapped around a can or bottle speeds up cooling through evaporation. Place the wrapped drink in the freezer for a short time, or in front of a fan at room temperature. The water evaporates and carries heat away from the container. This method works best for a quick chill, not for all-day cooling, and the towel should be damp, not dripping.
What is the best way to keep canned drinks cold without ice?
Use an insulated cooler with frozen water bottles or gel-filled cooler packs at the bottom, then place canned drinks above them. A stainless steel rack like those from Cooler Racks keeps cans and food separated from melting ice. Pre-chill the cans in the refrigerator first, and keep the cooler closed as much as possible. Double-walled glassware or insulated tumblers also help once a can is opened.
